Setup
Cloud Run is in Alpha, which means APIs may change in any version and documentation is not yet finished. See the changelog to stay up to date with breaking changes.
1. Install @remotion/cloudrun
- npm
- yarn
- pnpm
- bun
npm i --save-exact @remotion/cloudrun@4.0.289
pnpm i @remotion/cloudrun@4.0.289
bun i @remotion/cloudrun@4.0.289
yarn --exact add @remotion/cloudrun@4.0.289
Also update
remotion and all `@remotion/*` packages to the same version.Remove all
^ character in front of the version numbers of it as it can lead to a version conflict.2. Create a GCP project
Navigate to the Manage Resources screen in Google Cloud Console.
- On the Select organization drop-down list at the top of the page, select the organization resource in which you want to create a project. If you are a free trial user, skip this step, as this list does not appear.
- Click Create Project.
- In the New Project window that appears, enter a project name and select a billing account as applicable. A project name can contain only letters, numbers, single quotes, hyphens, spaces, or exclamation points, and must be between 4 and 30 characters.
- Enter the parent organization or folder resource in the Location box. That resource will be the hierarchical parent of the new project. If No organization is an option, you can select it to create your new project as the top level of its own resource hierarchy.
- When you're finished entering new project details, click Create.
3. Enable billing in the GCP Project
In order to enable the Cloud Run API, billing must be enabled in this project. Navigate to the Billing screen in Google Cloud Console. Follow the on-screen prompts to create a billing account, and then link the new project to this billing account.
4. Setup Permissions / APIs / Service Account in GCP
Google Cloud Shell is a browser-based command-line interface (CLI) for managing resources and applications hosted on GCP. It provides a virtual machine with pre-installed command-line tools and utilities, including the Google Cloud SDK and Terraform. Through this shell you can access your projects, resources, and services directly in the browser. The following steps pull in a script to enable necessary APIs, resources and permissions in your project.
-
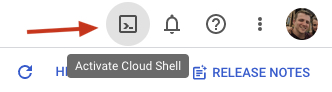
Navigate to the Dashboard and ensure your new project selected in the top drop-down. Then, in the top right hand corner of the screen, click the Activate Cloud Shell icon
-
Within the Cloud Shell, type the following command and follow the prompts.
bashcurl -L https://github.com/remotion-dev/remotion/raw/main/packages/cloudrun/src/gcpInstaller/gcpInstaller.tar | tar -x -C . && node install.mjs
- Select 1to setup this project for Remotion Cloud Run, or to run the setup again for an update.
- Select 2to generate a new .env file, or manage keys already created, and follow these steps instead.
-
When prompted to apply the plan, type
yes. When prompted to generate the .env files, typeyes. -
Run the following command to view the environment variables. Copy them into your local
.envfile (create it if it doesn't exist):bashcat .env -
Remove the .env file from the virtual machine:
bashrm .env
5. Optional: Validate the permission setup
From within your code base, run the following command to validate the permissions are setup correctly in GCP. As long as your GCP project was setup with a matching Remotion version, this should pass.
For the following steps, you may execute them on the CLI, or programmatically using the Node.JS APIs.
6. Deploy a service
- CLI
- Node.JS
Deploy a service that can render videos into your GCP project by executing the following command:
bash
You can deploy a service that can render videos into your GCP project using deployService().
tsdeployResult = awaitdeployService ({projectID : 'my-remotion-project',region : 'us-east1',});
The object that is returned contains a name field, which you'll need for rendering.
The service consists of necessary binaries and JavaScript code that can take a serve URL and make renders from it. A service is bound to the Remotion version, if you upgrade Remotion, you need to deploy a new service. A service does not include your Remotion code, it will be deployed in the next step instead.
A Cloud Run URL will be printed, providing unique endpoint for accessing the deployed service and performing a render. Alternatively you can use the Service Name, that is also printed, for accessing the deployed service and performing a render.
7. Deploy a site
- CLI
- Node.JS
Run the following command to deploy your Remotion project to a Cloud Storage bucket. Pass as the last argument the entry point of the project.
bash
A serveUrl will be printed pointing to the deployed project.
When you update your Remotion code in the future, redeploy your site. Pass the same --site-name to overwrite the previous deploy. If you don't pass --site-name, a unique URL will be generated on every deploy.
First, you need to create a Cloud Storage bucket in your preferred region. If one already exists, it will be used instead:
tspath from 'path';import {deploySite ,getOrCreateBucket } from '@remotion/cloudrun';const {bucketName } = awaitgetOrCreateBucket ({region : 'us-east1',});
Next, upload your Remotion project to a Cloud Storage bucket. Specify the entry point of your Remotion project, this is the file where registerRoot() is called.
tsserveUrl } = awaitdeploySite ({bucketName ,entryPoint :path .resolve (process .cwd (), 'src/index.ts'),siteName : 'my-video',});
When you update your Remotion code in the future, redeploy your site. Pass the same siteName to overwrite the previous deploy. If you don't pass siteName, a unique URL will be generated on every deploy.
8. Render a video or still
- CLI
- Node.JS
- Render Media
- Render Still
<serve-url | site-name>The serve URL was returned during step 7, site deployment. If using a serve url from a Cloud Storage bucket, you can pass the site-name instead.<composition-id>Pass in the ID of the composition you'd like to render.
- Render using Cloud Run Url
- Render using Service Name
<cloud-run-url>The Cloud Run URL was returned during step 6, service deployment.
bash
<service-name>The Service Name was returned during step 6, service deployment.<region>The region the Service is in, which was returned during step 6, service deployment. This is only required if using the service name.
bash
Progress will be printed until the video finished rendering. Congrats! You rendered your first video using Remotion Cloudrun 🚀
<serve-url | site-name>The serve URL was returned during step 7, site deployment. If using a serve url from a Cloud Storage bucket, you can pass the site-name instead.<still-id>Pass in the ID of the still you'd like to render.
- Render using Cloud Run Url
- Render using Service Name
<cloud-run-url>The Cloud Run URL was returned during step 6, service deployment.
bash
<service-name>The Service Name was returned during step 6, service deployment.<region>The region the Service is in, which was returned during step 6, service deployment. This is only required if using the service name.
bash
Congrats! You rendered your first still using Remotion Cloudrun 🚀
- Render Media
- Render Still
You already have the service name from a previous step. But since you only need to deploy a service once, it's useful to retrieve the name of your deployed service programmatically before rendering a video in case your Node.JS program restarts. We can call getServices() with the compatibleOnly flag to get only services with a matching version.
tsgetServices ,renderMediaOnCloudrun } from '@remotion/cloudrun/client';constservices = awaitgetServices ({region : 'us-east1',compatibleOnly : true,});constserviceName =services [0].serviceName ;
We can now trigger a render of a video using the renderMediaOnCloudrun() function.
tsresult = awaitrenderMediaOnCloudrun ({serviceName ,region : 'us-east1',serveUrl :url ,composition : 'HelloWorld',inputProps : {},codec : 'h264',updateRenderProgress ,});if (result .type === 'success') {console .log (result .bucketName );console .log (result .renderId );}
Import from @remotion/cloudrun/client to not import the whole renderer, which cannot be bundled.
The render will now run and after a while the video will be available in your cloud storage bucket. You can keep track of the render progress by passing a function to the updateRenderProgress attribute, to receive progress as a number.
Congrats! Check your Cloud Storage Bucket - you just rendered your first video using Remotion Cloud Run 🚀
You already have the service name from a previous step. But since you only need to deploy a service once, it's useful to retrieve the name of your deployed service programmatically before rendering a video in case your Node.JS program restarts. We can call getServices() with the compatibleOnly flag to get only services with a matching version.
tsgetServices ,renderStillOnCloudrun } from '@remotion/cloudrun';constservices = awaitgetServices ({region : 'us-east1',compatibleOnly : true,});constserviceName =services [0].serviceName ;
We can now trigger a render of a still using the renderStillOnCloudrun() function.
tsresult = awaitrenderStillOnCloudrun ({serviceName ,region : 'us-east1',serveUrl :url ,composition : 'HelloWorld',inputProps : {},imageFormat : 'jpeg',});if (result .type === 'success') {console .log (result .bucketName );console .log (result .renderId );}
Import from @remotion/cloudrun/client to not import the whole renderer, which cannot be bundled.
The render will now run and after a while the image will be available in your cloud storage bucket.
Congrats! Check your Cloud Storage Bucket - you just rendered your first still using Remotion Cloud Run 🚀
Next steps
- Select which region(s) you want to run Remotion Cloud Run in.
- Familiarize yourself with the CLI and the Node.JS APIs (list in sidebar).
- Learn how to upgrade Remotion Cloud Run.
- Before going live, go through the Production checklist.